Introducing Blinkitten badge!
The customizable blinky kitten badge made with ❤️ by MysteryHack for Hack-én 1st edition.
Getting a Blinkitten Badge
To get your hands on a Blinkitten badge you can either attend @deantonious's workshop "#badgelife culture and hardware hacking" or simply look for him around the conference (might be wearing a Dipper Pines cap) during Hack-én.
Assembly Instructions
Final released Badge
Follow these steps to solder your #blinkitten badge:- Solder the battery holder. Pay special attention to the + and - icons on the silkscreen and the battery holder!
- Solder the switch making sure it's well fit on the PCB holes.
- Bridge the optional resistor pads (not needed for the used LEDs).
- Solder the left LED making sure the long leg (anode / +) is soldered to the longger pad and the short leg (cathode / -) is soldered to the short pad.
- Solder the right LED as you did with the left one.
- Bend the legs to hidde them both behind the cat ears.
Hack-én Distributed Badge
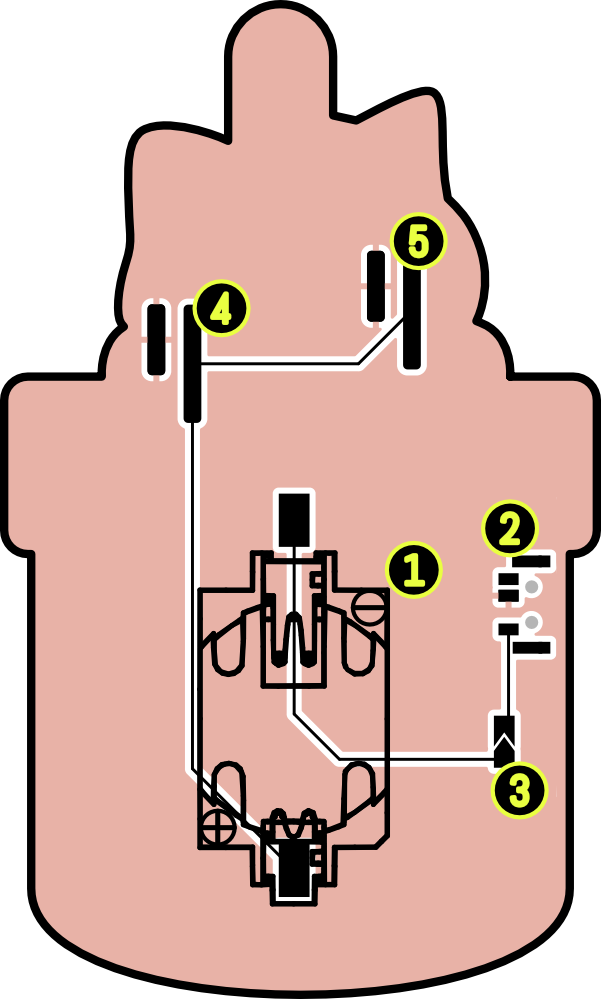
We had a small error when sending the files to the factory, but the badge is fully functional. If you want to use the ON/OFF switch (instead of having an always ON badge), it can be easily done following these steps:- Use a hobby knife or cutter to cut the miss-connected route.
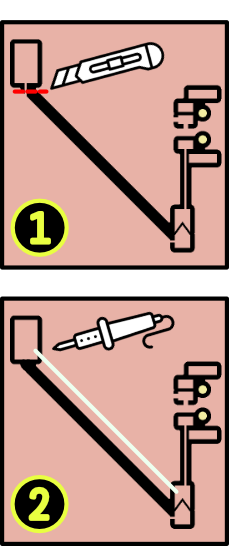
- Solder the included cable to the battery holder pad and the top pad of the optional resistor.